
Learning how to draw hair can seem like an overwhelming task. With so many strands of hair, it’s difficult to know where to begin! In this tutorial, I’ll show you how to draw hair in four simple steps. This easy-to-follow process will take the stress out of drawing realistic hair.
Drawing supplies for this project:
- 2H pencil (for light sketching)
- 2B pencil (for shading and detail)
- Sketchbook paper
- Eraser (for rubbing out sketch lines)
Optional: Blending stump or Q-tip (for blending shading)
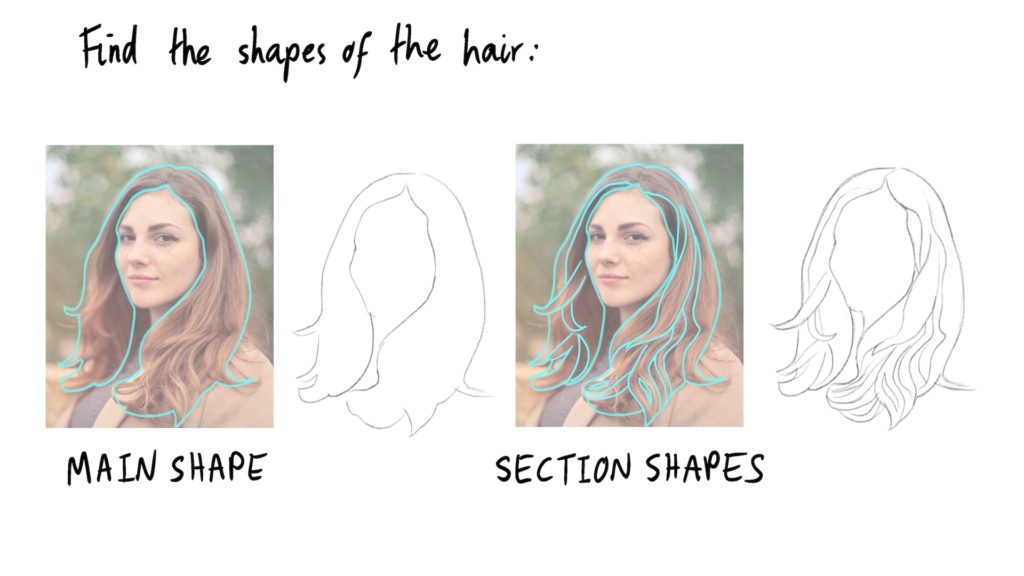
Step One: Focus on shapes
The bulk of the hair consists of thousands of individual strands. Even if we could see all the strands, they would be very time-consuming to draw. The key to drawing hair is to break it down into simple shapes.
First, lightly draw the outline of the hair’s overall shape using a lighter pencil like a 2H. Then, draw the shapes that make up the sections of hair. Sections of hair form when the individual strands clump together in curls or waves. For long wavy hair, these sections often look like long ‘s’ shapes. If you are working from a photograph, take your time and draw the main shapes that you see. Think of the sections as puzzle pieces that fit together.
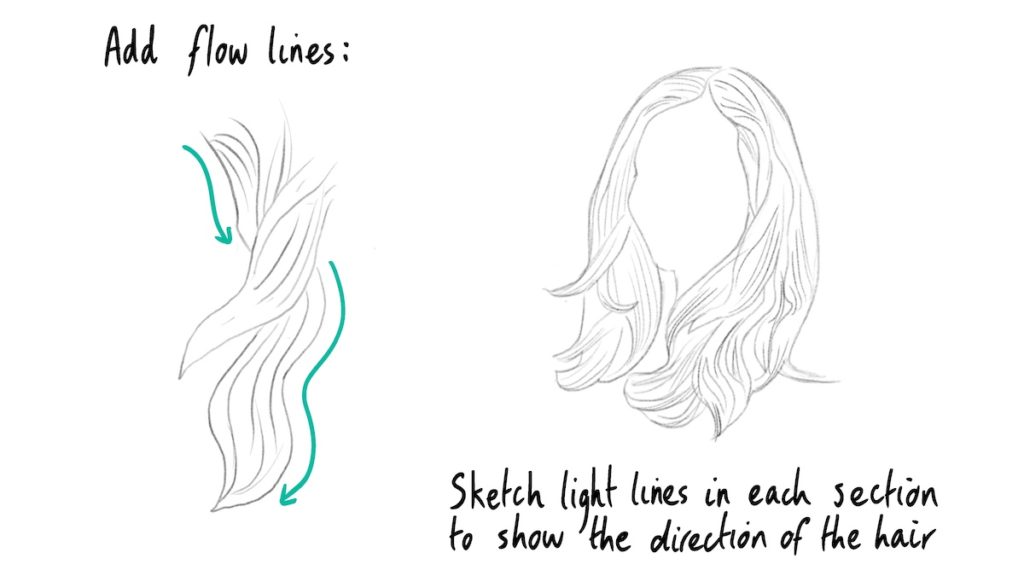
Step Two: Show the direction of the hair
Now, add the direction of the hair inside each shape. Use the flicking motion with your pencil to add a few lines that follow the flow of the hair in each section. This will help to create the natural waviness and movement of the hair. It is important to keep your lines very light until we add shading in the next step.
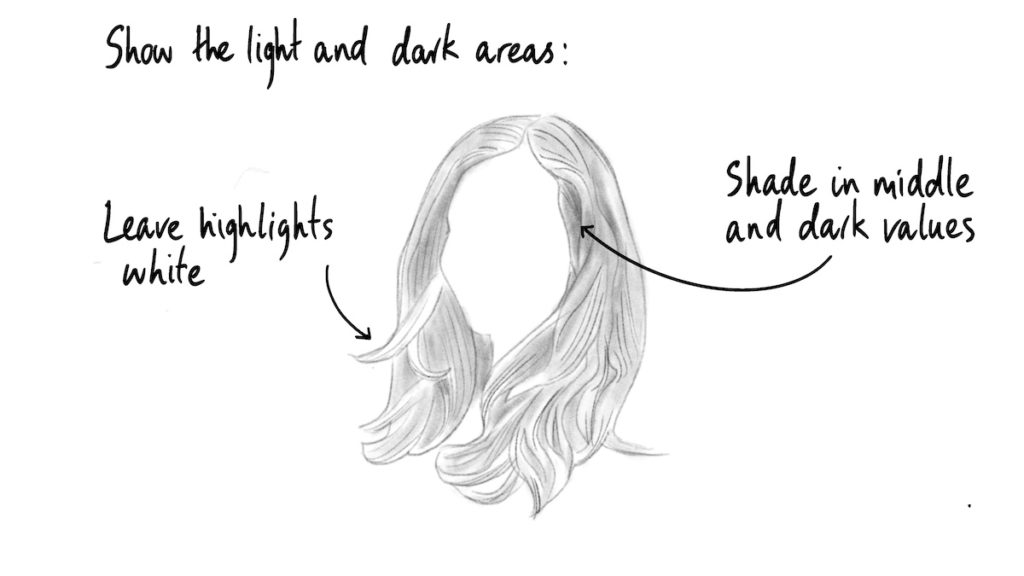
Step Three: Find light and dark areas
At this point, we can start adding some simple shading. To create depth in the hair, we need to shade light, middle, and dark tonal values. First, draw shapes for the highlights (where the light hits the hair directly). Leave these highlighted areas blank so the white of paper comes through. Next, find the mid-tones and dark areas of the hair to shade. Use a 2B pencil to shade with. If you prefer a smooth look, you could use a blending stump or Q-tip to soften your shading. In our example, the darkest areas are around the face and directly under the layered hair sections.
Don’t worry about it looking perfect yet. We can call this the “ugly stage” of the drawing! Our goal is to add in the values by using simple shapes that show white highlights, the gray middle areas, and the really dark areas as shapes.
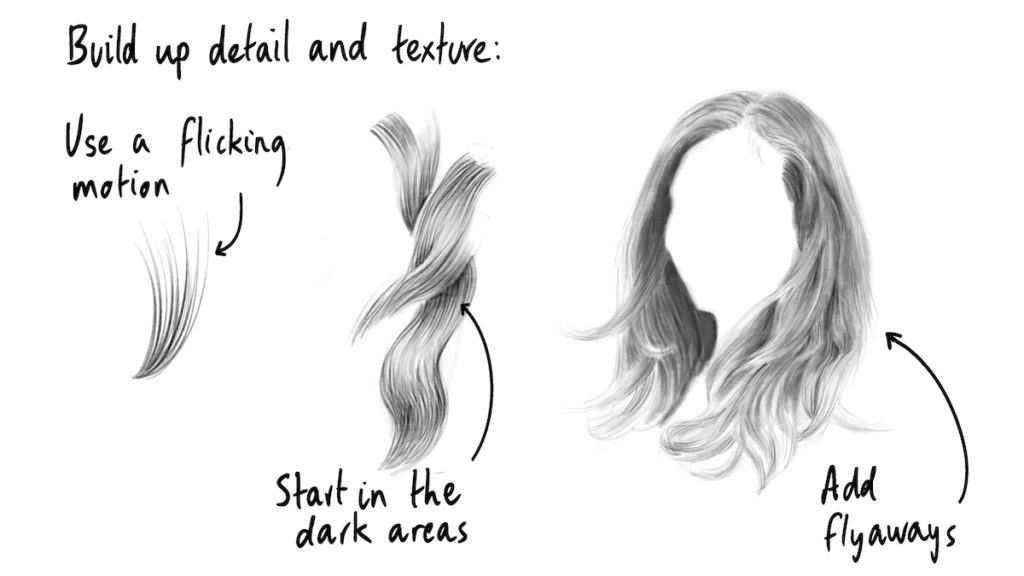
Step Four: Add pattern to show the texture of the hair
Once we have depth in the hair, then we can think about how to show the strands of hair. Instead of drawing single hairs, we can use a pattern to create the illusion of lots of strands of hair. Use a sharp 2B pencil for this step to create darker details over your shading.
Use a flicking motion to add lines that start from the darkest areas and fade out in the lightest areas. Follow the direction of the hair. As your pencil leaves the page at the end of each “flick,” it should leave a narrow, sharp point. Don’t overdo the pattern, and make sure each section still has a highlight area.
Add more shading to the hair as needed. Be careful to keep the light and dark values in the correct place. If the hair is brunette or black, add light shading to the highlight areas and heavier shading to the shadow areas. This will help the viewer understand that the hair color is darker.
To finish, add a few light flyaway strands of hair for a natural and more realistic look.
You can use these steps to draw all different kinds of hair: short, long, blonde, black, straight, curly, or wavy! The steps are essentially the same. However, the shapes and the tonal values will vary.
I hope this tutorial has shown you that drawing hair doesn’t have to be an intimidating process!
Now that you have an overview of the process for drawing hair, you might like to watch the video I’ve made for this tutorial. Get out your sketchbook and draw along with me!
Keep practicing, and if you want to learn more about how to draw other elements of a portrait, check out these tutorials:
How To Draw Realistic Lips – A Step By Step Process
How To Draw A Realistic Nose In Four Simple Steps
This article was originally posted on Udemy’s Blog: Learn How To Draw Hair In Four Simple Steps