If you’re on the journey of learning to draw, I’m sure you’ve encountered the challenge of drawing circles and ellipses. If you’re struggling with these shapes, have a go at the three techniques below to see what works best for you when it comes to drawing symmetrical, natural looking ellipses.
Why Do I Need To Learn How To Draw Circles And Ellipses?
Of course, you can use a tool like a compass for drawing circles but until you learn how to draw them freehand, you’ll never reach your full sketching potential. Drawing from observation or imagination requires an artist to first see their subject as simple shapes. Think about the simple shapes of these subjects: a vase, a bicycle, a person’s head, a bird. All of these subjects are made up of circles or ellipses. Ellipses are especially useful for drawing cylindrical objects like bottles, wheels or even parts of the body like the cylinders of the limbs or fingers.
What Is An Ellipse?
If you’re not sure what the difference between an ellipse and a circle is:
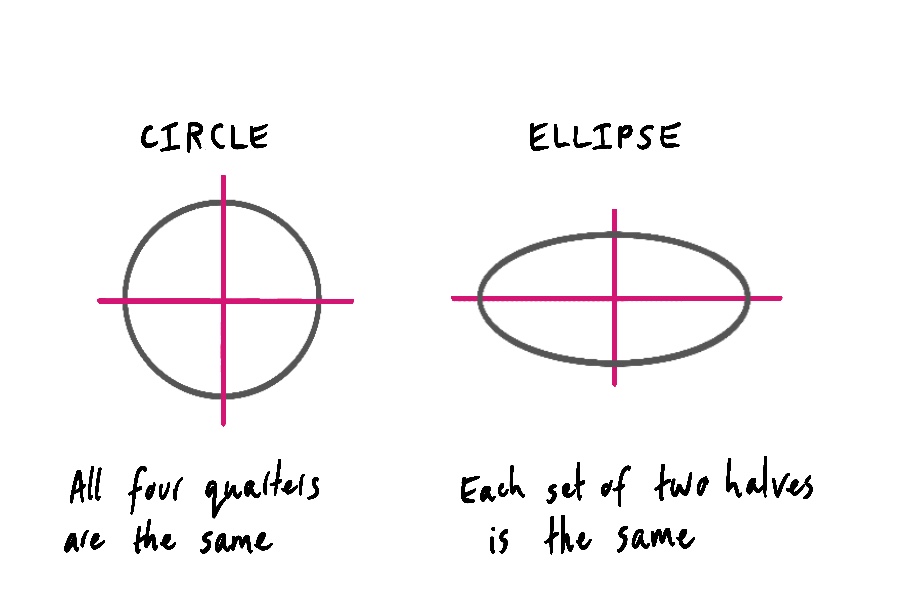
A circle is a completely symmetrical shape – if you fold it in half widthways and lengthways it has equal quarters.
An ellipse is a variation of a circle. It has a rounded sides. The long halves are equal and the short halves are equal. An ellipse is essentially an oval shape.
Why Is It Hard To Draw Circles And Ellispes?
The main problem people have with drawing ellipses freehand is consistency. You need to train your hand to be able to draw a circular shape at any size and any angle. Drawing squares and other shapes with straight lines is easier simply because moving your hand in one direction is easier. To train your hand to move consistently in a circular rhythm takes time and many people give up too soon. Here are three ways I recommend practicing drawing ellipses. Try each one out and see what works best for you.
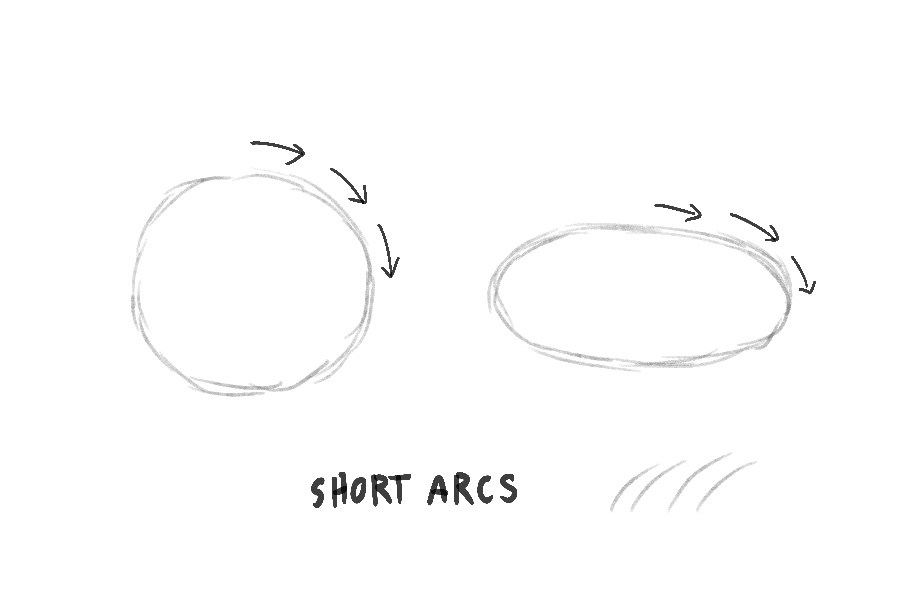
Short Arcs:
This technique involves using small wrist movements to create short, overlapping lines or arcs. By starting with short, light lines and working around the circle several times, you can adjust and smooth out any imperfections as you go. This approach allows for greater control and precision, resulting in more accurate circle shapes.
PROS:
The hand stays in one place as the fingers and wrist create the movement, making it a very stable position. You can adjust the shape as you go.
CONS:
Because you are layering up lots of short lines, the edge can get quite thick and heavy looking.
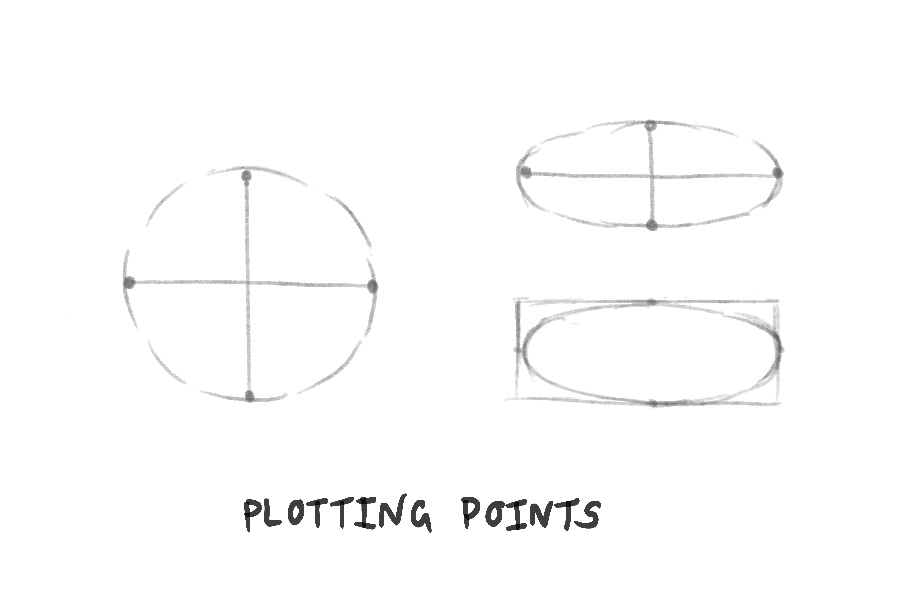
Plotting Points:
For artists who prefer a more methodical approach, plotting points can be an effective technique. Start by marking a point and the top and bottom and each side of your ellipse to decide the size. Then connect the points with short light lines. The trick here is to always make sure you are curving around the points. This method can help when drawing circles of varying sizes or when accuracy is important. Another variation of this method is to draw a rectangle the size of the ellipse you want and then draw the ellipse inside the rectangle. This is useful for cylindrical objects like bottles, cups or vases.
PROS:
The size of the ellipse can be mapped out before drawing the outline.
CONS:
It is common for people to unintentionally narrow the ellipse at the mapped points, resulting in an ellipse with ‘corners’.
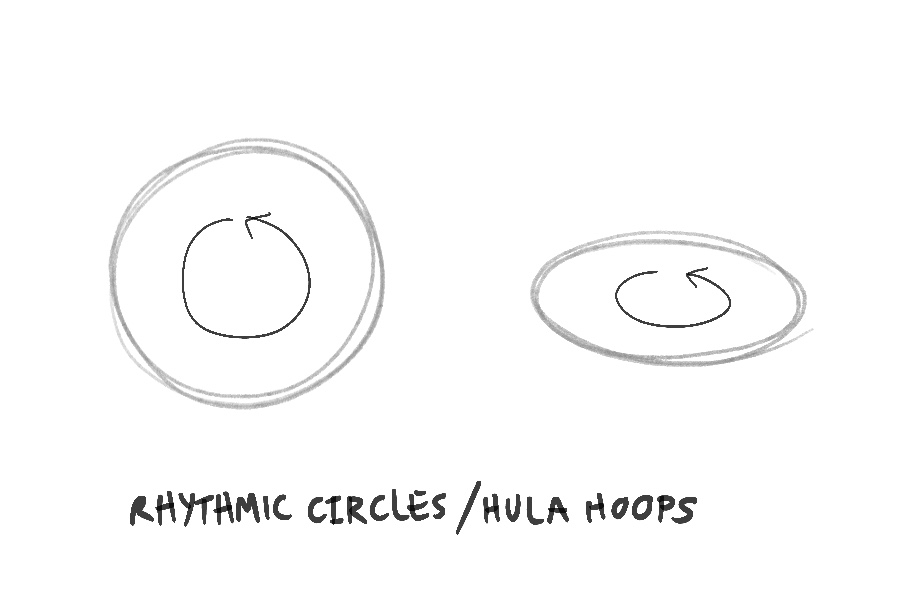
Rhythmic Circles (Hula Hoops):
This is by far the most useful method to master. It enables you to quickly sketch natural looking ellipses. The downside? It takes a long while to develop the necessary coordination to draw consistent ellipses using this method. The trick to this method is to move your hand in a consistent circular rhythm, like a hula hoop, as you lower your pencil to the page. With the entire hand moving on the page, draw several rotations in the same spot, allowing the rhythm of your hand to create a natural, even looking ellipse.
PROS:
This method is the quickest and gives the most natural looking result.
CONS:
It is difficult to control your hand when it is moving across the page. It requires the most practice to master.
PRACTICE TIP:
Practice rhythmic circles regularly as a warm up exercise on scrap paper instead of wasting sketchbook pages. You can draw over top of what you’ve already done and draw on the front and back. The practice is about repeating and refining the movement.
Developing the coordination to draw ellipses freehand takes time and practice.
There is no right way to draw a circle. Choose the technique that works best for what you are drawing.
Practice drawing ellipses regularly. Even just five minutes as a warm up on scrap paper will help!
Whether you are drawing a simple still life scene or a portrait, drawing circles is an essential skill to master….so get practicing! For general practicing tips check out this tutorial on How To Practice Drawing To Get Better, Faster!