How To Draw Realistic Lips – A Step By Step Process
How To Draw Realistic Lips
Drawing portraits is fun and fulfilling, but it can also be challenging. If you want to improve, the best place to start is by practicing sketching features of the face. There are two common mistakes people make when learning how to draw lips. In this tutorial I’ll show you how to avoid these mistakes and draw realistic-looking lips in seven simple steps.
Drawing supplies for this project:
2H pencil (for light sketching)
2B pencil (for shading and detail)
Sketchbook paper
Eraser
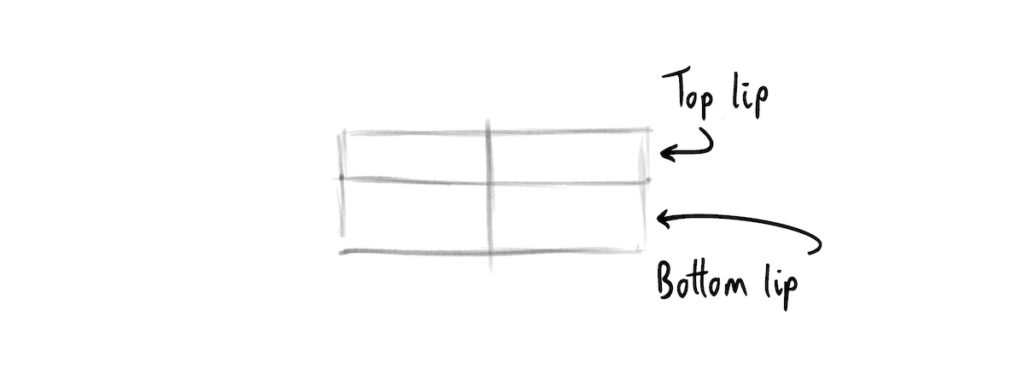
Step One: Decide the length and height of your drawing
Start with a 2H pencil and sketch a rectangle to show the length and height of the top and bottom lip. If you are drawing from a photograph, look at how long the mouth is and how high the mouth is. This step is just to get some simple guidelines down on the page, and then we can start putting in the actual shapes.
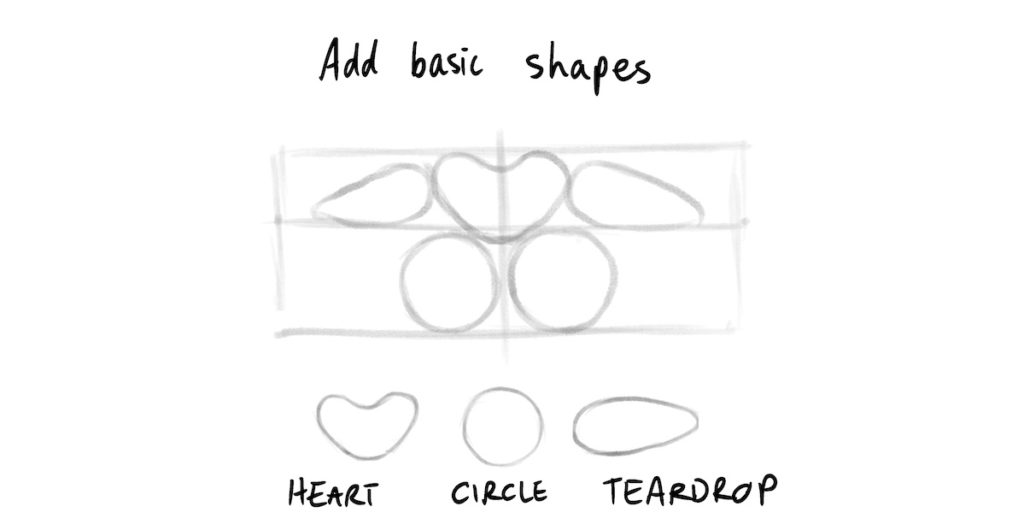
Step 2: Sketch the simple shapes of the lips
To draw the shape of the lips, lightly sketch in three shapes for the top lip and two for the bottom lip. Draw the heart shape in the middle of the top lip. It will come down slightly lower than the centerline. These shapes show the underlying form of the lips. (Take a look at your own lips and see if you can find the five shapes!)
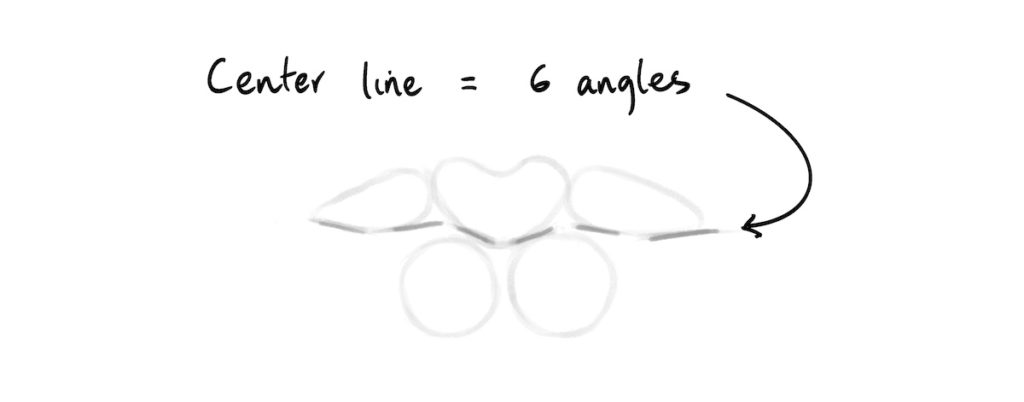
Step 3: Draw the important angles of the lips
Many assume lips are only made up of curved lines, which is the first common mistake people make when trying to draw a realistic mouth. In fact, some critical angles show the expression of the mouth. The key to capturing the expression of the lips is to look at the centerline between them. Six angles usually make up the centerline, which follows the shapes of the top lip. The way the angles slant up or down will show if the expression is smiling, neutral, or frowning.
Draw six angles for the centerline. Now we have a map for the rest of the drawing.
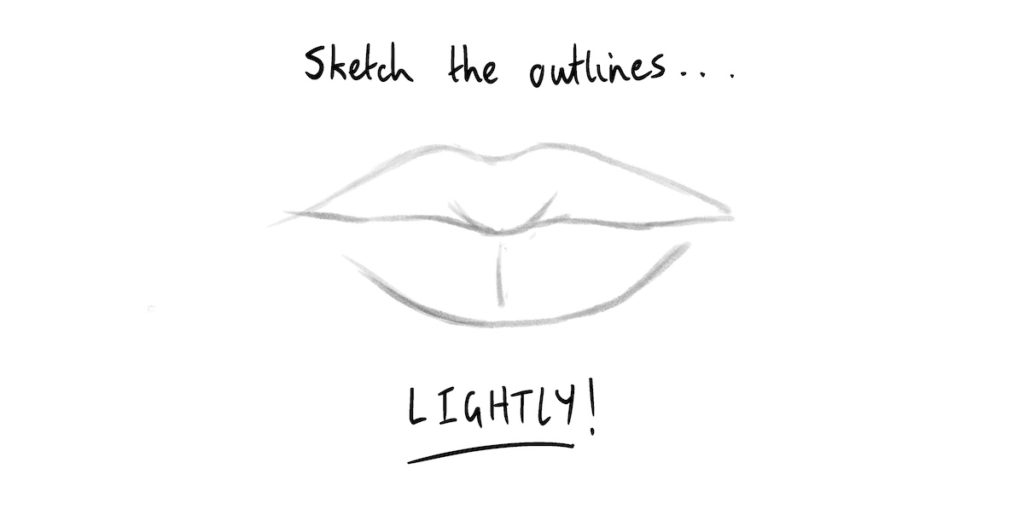
Before we start shading, lightly sketch the outline of the lips and erase any lines you no longer need.
Step 4: Shade the lips
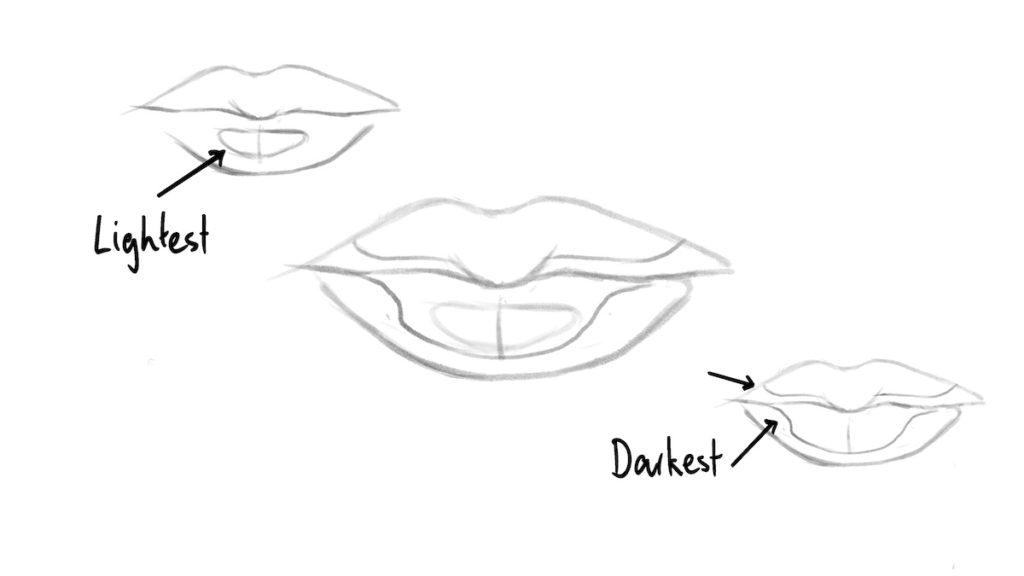
To create the volume of the lips, we need to make sure the light, middle, and dark tonal values are in the correct place, which may change depending on where the light source is. But if the light is coming from overhead, there will be a reflection (highlight) on the center of the lower lip.
Sketch around the highlight shape with very light lines so you know which area to leave white. Do the same with the darkest shapes at the sides and lower edge of each lip. Now we have identified the lightest and darkest areas.
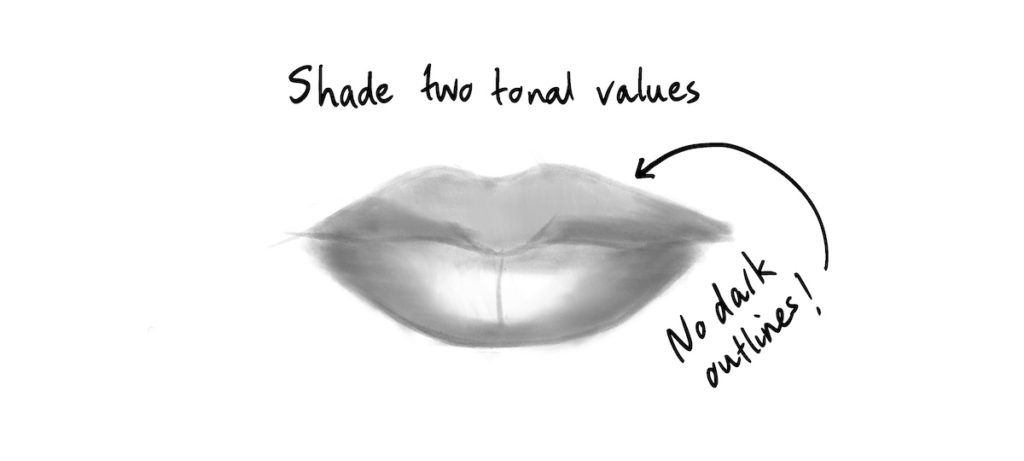
The second common mistake people make is drawing an outline around the lips that is darker than the shading. If you look in the mirror, you will see that the top lip has a very light upper edge where the light hits it. If you add an outline to the top of the lip, the drawing will appear flat and cartoonish. So make sure your outlines are not darker than your shading.
Switch to a 2B pencil and shade in all the lips except the light spot. Then shade the darker areas overtop.
Step 5: Centerline and wrinkle lines
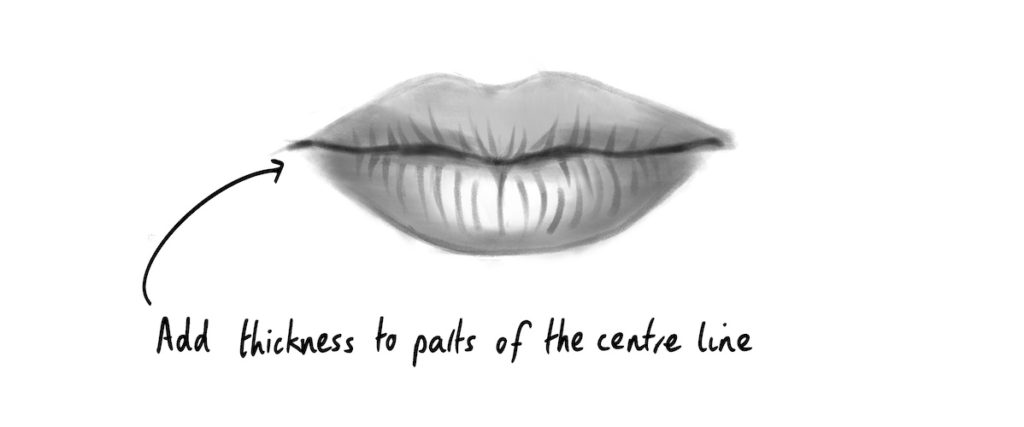
We’ve shaded the lips, and now we’ll add a darker line to the centerline of the lips. Use a 2B pencil on its side to get a soft dark mark. Change the quality of the line from thick at the corners to thin and then thick again close to the middle. Add in other small details like wrinkles on the top and bottom lip. The wrinkles on the lips curve gently around the contour of the lip.
Step 6: Adding details
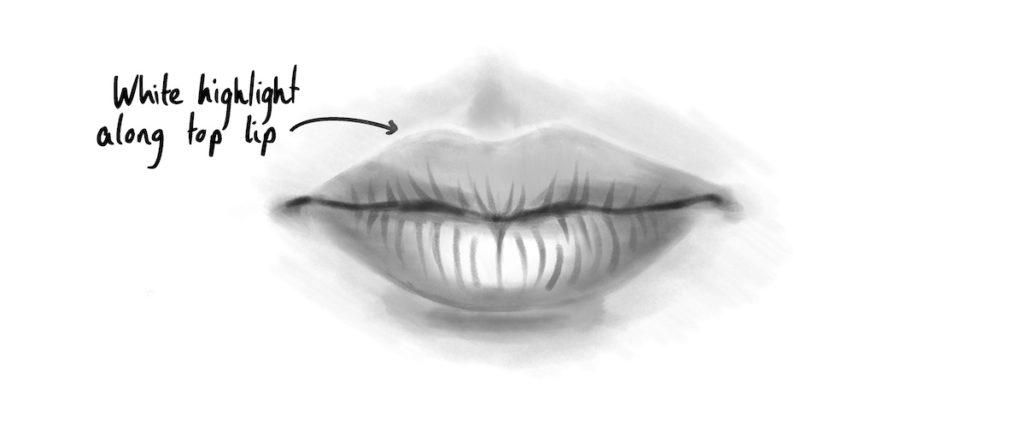
To make the lips look like they are protruding from the face, add some light shading above and below the lips. You can use a tissue or a Q-tip to blend the skin softly. Use a putty eraser to make sure the highlight on the bottom lip and the highlighted line along the top lip are bright. Add a shadow underneath the bottom lip.
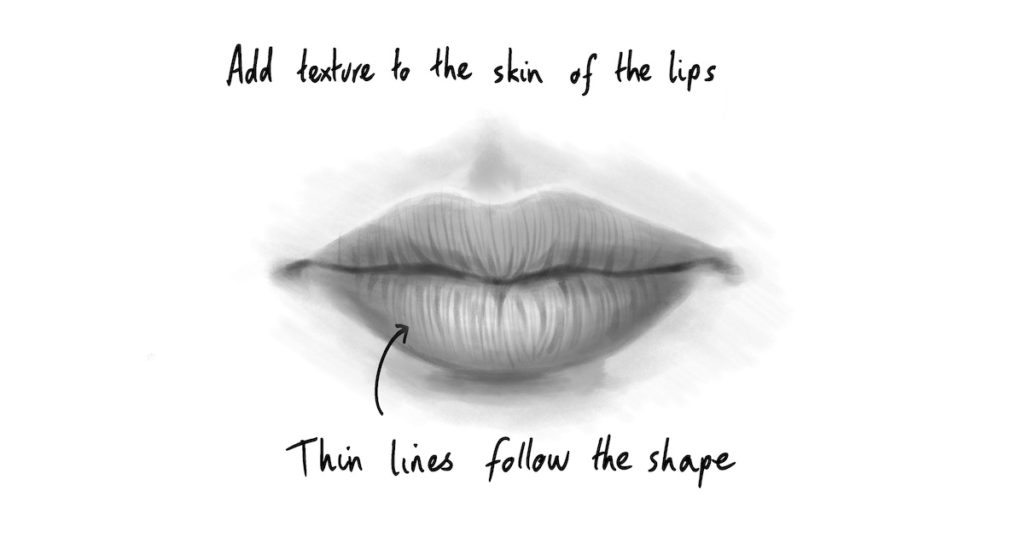
Build up the shading and add more texture to the skin of the lips using a pattern of thin lines that follow the shape of the lips.
Step 7: Final touches
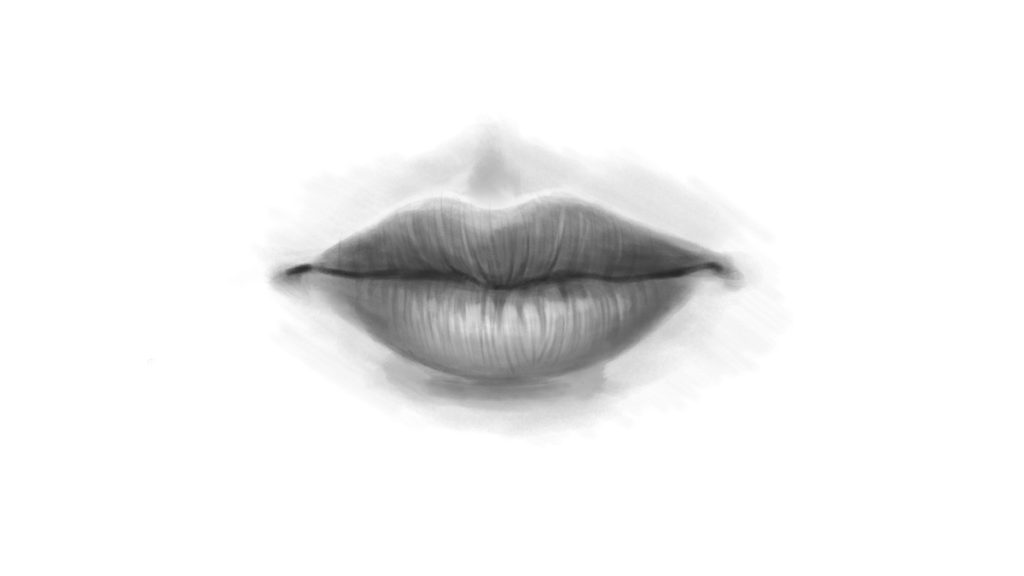
To finish the drawing, slowly build up dark gray values on the top lip. The textures should remain visible through the shading. Finally, use a putty eraser to add fine highlights. Lighten the Cupid’s bow of the top lip, and add a highlight to prominent wrinkles on the lower lip.
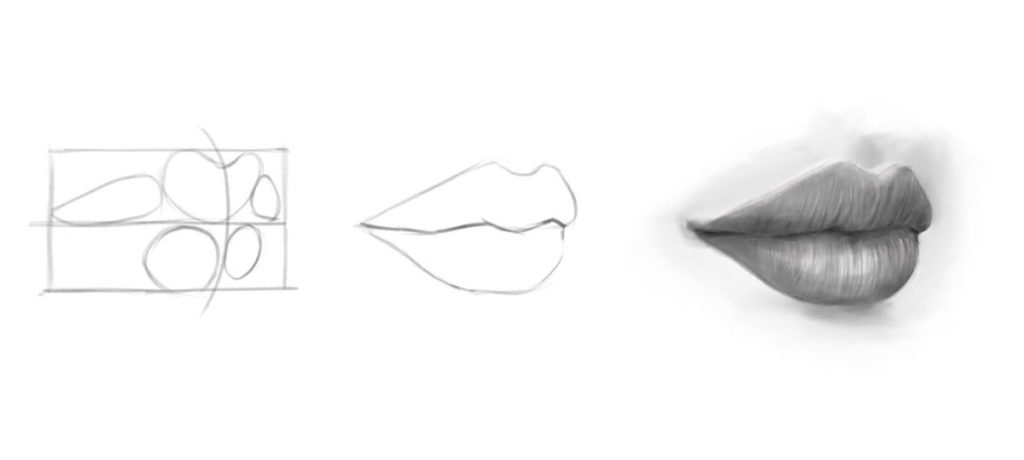
EXTRA: Draw lips from alternate views:
To draw the lips from a ¾ angle, position the vertical line more to the right. The vertical line will curve slightly outwards. The heart shape in the center of the top lip will protrude towards the right, and we will see more of the left side. Follow the rest of the steps in the tutorial to complete.
I hope this tutorial has simplified the process of drawing realistic-looking lips. You can also follow the Youtube video below to try it out for yourself.